Working with brushes for Photoshop CS3
Working with brushes in Adobe Photoshop CS3 is very interesting, as you can apply different sets of brushes, load them additionally using either the Style Library or an external set. The most exotic brushes from the Internet are available — you just need to learn how to upload them to the program! And with the help of brushes, experiments in the program will become more creative and multifaceted. This article is about just that: downloading, creating and customizing brushes.
Stage 1. Using brushes
Let’s create a new document in Photoshop CS3: File → New (or, for lovers of hotkeys, Ctr l + N ) with any size:
1. Activate the Brush Tool — the main working tool in this lesson:
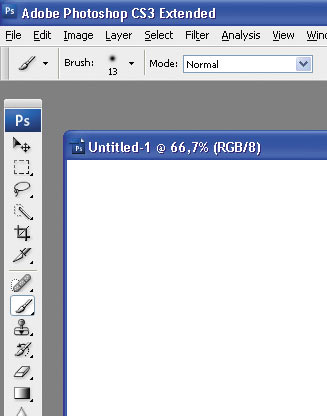
Pay attention to the options panel of this tool: the option that contains options for adjusting the size, shape and hardness is also called Brush!
2. Expand the Brush option in the drawing panel and scroll through the list of brushes:

Each type of brush corresponds to a specific task: some brushes imitate the work of natural tools (chalk, oil, gouache) quite well, others can finish the ends of the hair and retouch the skin. Choose a decorative brush like a maple leaf!
3. Matching the color of the brush:

Each type of brush corresponds to a specific task: some brushes imitate the work of natural tools (chalk, oil, gouache) quite well, others can finish the ends of the hair and retouch the skin.
Choose a decorative brush like a maple leaf!
4. Draw a brush with the selected color over the canvas. What we got:

Here it is — a tricky brush setting! We draw with a brush, and we get a lot of leaves, all at different angles and different sizes, and the color changes …
Stage 2. Loading the brushes
1. In Photoshop, most of the brushes are hidden, but they are easy to get:

If you expand the Brush option in the toolbar and click on the button, you’ll see a series of commands, of which the entire last block is the brushes that Photoshop has available! Before you is the so-called «Brush Library». Choose, for example, the Special Effect Brushes set.

| Tip In the pop-up window that appears after clicking, select the option Appended (add) — thanks to this you will not lose the original brushes! |
2. Result: decorative brushes have arrived! Butterflies and flowers! How to download exactly what you need?

The algorithm is simple: download any brush from the Internet and run the command:
Edit → Preset manager

In the window that appears, execute the Load command and specify the path to the desired brush!
For example, let’s choose a lightning brush.
Result:

The brushes are loaded — you can already paint with them in various colors and sizes!
| Tip When working with decorative brushes, it is advisable to first create a new layer in the Layers palette. In the future, this will give you the opportunity to move the brushstroke lying on a separate layer (Move tool), as well as modify it using the transformation commands (Ctrl + T). |
Stage 3. Creating brushes
1. To create a brush, use contrasting colors: for example, a white background and a black object, although this is not necessary. Consider a simple option:
Create a document ( File -> New ) 10×10 cm.
Pick black for the Brush tool and choose a regular brush shape.
Draw something on the canvas.
Run the command: Edit -> Define Brush Preset .
Give the brush a name (optional).


Ready! Now you can paint with your new brush, any colors and sizes!
2. But that’s not all! How did natural brushes in the form of crows, diamonds, lips come into being? Were they drawn by geniuses? Absolutely not necessary! After all, you can identify a brush from any photo!

Open any photo.
Run the command: Edit -> Define Brush Preset .
Give the brush a name.
Create a larger document (50×50 cm).
Select the Brush tool and in the Brush option find your brush (at the very bottom of the list).

| Tip If you want to define not the entire image as a brush, but only part of it, use the Eraser tool (eraser). You should carefully erase unnecessary parts of the image and execute the command Edit → Define Brush Preset. Do not worry about the erased places — the program simply will not see them! Work strictly on Background — the function does not tolerate transparency! |
Stage 4. Adjusting the brushes
1. The purpose of this step is to make the brush interesting! An example would be wedding photography.

We open any interesting photo and eliminate the original background in any way convenient for you.

Adding flair:
Gradient on a separate layer. How the Gradient tool works .
Illumination internal and external. Working with Outer Glow and Inner Glow effects .
Circles on the water with Zig — Zag filter .
2. Let’s start creating a brush!

As usual, create a new document: File -> New 10×10 cm in size.
Select an alternative tool for creating a brush: Shape tool .
In the options bar, select a heart among other shapes.
Draw a heart by holding down the left mouse button.
Define the shape (in fact, it is a vector mask) as a brush with our command: Edit -> Define Brush Preset .
Attention! The command will work ONLY if you first eliminate the contour of the figure. If you have not encountered vector objects before, then it is enough just to click on Background in the Layers palette . The outline of the figure will disappear.

| Tip To make the brush voluminous, I recommend using styles. You can even use the program’s standard presets in the Styles palette. |
3. Trying out the brush! As long as it’s boring…

1. Create a training ground again (50×50 cm).
2. Select the Brush tool and in the Brush option find your heart brush.
3. Draw: When brushing, it just creates a series of objects.
4. Brush setting:

Just press the F5 key on your keyboard when the Brush tool is activated, and you will see an advanced brush setting! You can also run the command from the main menu: Window → Brushes.

We put down the settings with you, as in the screenshots, make sure that the look of the brush has changed (the process can be observed in the preview window). In the first category, we make adjustments for size oscillation and rotation angle.
Attention! To set the settings, it’s not enough to check the Shape Dynamics category , you need to click on this category!

In the Color Dynamics category, set up color fluctuations.
Attention! We have set the Foreground and Background oscillation, which means that the color range of the future brush depends on your active colors in the program!

In the Scattering category, adjust the scatter of the brush.
| Tip The brush with all the settings can be re-saved. |
![]()
Depending on the color of the active colors, I will see fluctuations in the color of the brush. Here I can safely count on the blue-bluish-white range! Change colors if necessary.
Result:

Create a new layer: Layer → New → Layer (Ctrl + Sift + N), start painting with a brush!